Manage menu ordering and style of MyAccount to display on store
Introduction
In this article, we'll guide you through the process of managing your menu's order and style, ensuring that your store's navigation is both user-friendly and aligned with your brand's aesthetic.

Overview🗂️
Style & Branding
Menu ordering
Home tab
Refer a friend
Custom menu
Affiliate program configuration
Style & Branding
Here are the steps for managing the branding and styles -:
Step 1: Go to Customer Account >> Display on Store
Step 2: Click on Branding and edit the styles as per your need
Theme Color: This sets the color of the buttons.
Button Text Color: This determines the color of the text on the buttons.
Primary Color: This controls the color of the heading text.
Secondary Color: This adjusts the color of menu text, input labels, and other textual elements
Menu ordering

Note: Before enabling the menu, make sure the module is activated.
From the Menu Ordering tab, you can reorder the sidebar menu, customize it according to your needs, and activate or deactivate the menus
Here are the steps for managing the menu ordering:
Step 1: Go to Customer Account >> Display on store

Step 2: Click on Menu ordering and Enable the button and drag an drop menu item as per your need
Note: The following menus are Shopify default menus and cannot be disabled.
My Profile
My order
Change password
Home tab
A dynamic and personalized dashboard that keeps customers engaged. This tab brings together everything your customers need in one place—cart items, available discounts, frequently purchased products, recent orders, tailored recommendations, and a customizable content section.
Here are the menus that you can add, enable, and disable -:
1.) Discount coupon - It provides information about total orders and Discount coupons available in your account.
To enable the discount coupon section enable the button - Display orders and discount statistics
2.) Cart abandoned message - It will display the information about the items that are available in your cart with a cart link.
Notes - The details cannot be changed are following -:
1.){{no. of items}} - It will show the details of no. of items which has been added to the cart.
2.) {{link title}} - It will display the title which you have set in the link title
The Loyalty Rewards section allows customers to earn, track, and redeem reward points for discounts and exclusive benefits. Customers can view their available points balance, lifetime points earned, claimed rewards, and various ways to earn or redeem points.
Key Features of Loyalty Rewards:
Points Balance Overview – Customers can view their available reward points, lifetime points earned, and the total number of rewards they have redeemed.
Earn Points Activities – Customers can earn points through various actions such as creating an account, making purchases, celebrating birthdays, leaving product reviews, and other reward-earning activities configured by the merchant.
Redeem Points for Rewards – Customers can exchange their earned points for available rewards, such as discount coupons, fixed-amount discounts, percentage discounts, free shipping, or other promotional offers.
Birthday Rewards – Customers can add their birthday details to receive bonus reward points on their birthday, encouraging long-term engagement and customer loyalty.
Points Activity Tracking – Customers can access the Points Report section to review their reward point history, including points earned, redeemed, and adjusted over time.
Reward Claim Status – Customers can easily track how many rewards they have claimed and monitor their remaining points balance for future redemptions.
The VIP Program section provides customers with an overview of their VIP tier and progress within the loyalty system. It highlights the current VIP tier status, which in this case is PLATINUM, along with a progress tracker indicating their journey towards higher tiers.
Key Features of the VIP Program:
Tier Status Display – Customers can view their current VIP tier level (e.g., Platinum, Gold, Silver).
Progress Tracker – A visual representation of the customer’s progress towards the next VIP tier.
Exclusive Rewards – Higher tiers may unlock special perks such as discounts, early access to sales, or free products.
5.) Available Coupon - This section displays information about the coupons/rewards code which can be copied on the click of the copy button.
There are a few settings, which are the following:
1.) How many discount coupons/rewards need to be shown? - It sets the number of Coupons/Rewards visible to the Home tab.
2.) Set priority to show coupons or rewards first - You can choose the priority of the discount which you wish to keep to the top. You can either keep coupons or rewards at the top
Following are the difference between Rewards and Coupons -:
1.) Coupon - Coupon which you have added to the Customer account page. To add coupons on the Customer account page - Click here.
2.) Rewards - Rewards are those coupons that are generated by redeeming the Loyalty rewards.
Save and Display Discount Codes on My Account Page via AiTrillion - Click here
6.) Recent orders - This displays information about recent orders. You can set the settings of the number of orders which has to be visible on the Home tab.
7.) Frequently bought together - This will display the recommendation of products based on past purchases. You can set the number of products needed to be displayed under frequently bought items. You can also display the number of items which has been purchased
9.) Custom section - You can add a Custom section according to your needs. You can also use source code and add the code to display the details
Note: To add a Custom field on the Customer account page - Click here
Custom menu
Note: You are allowed to create up to 5 custom menus. Ensure the changes made in any menus are properly saved.
Step 1: Click on Add new menu
Now the added details will be available on the My Account page
Note: To know more about the menu - Click here
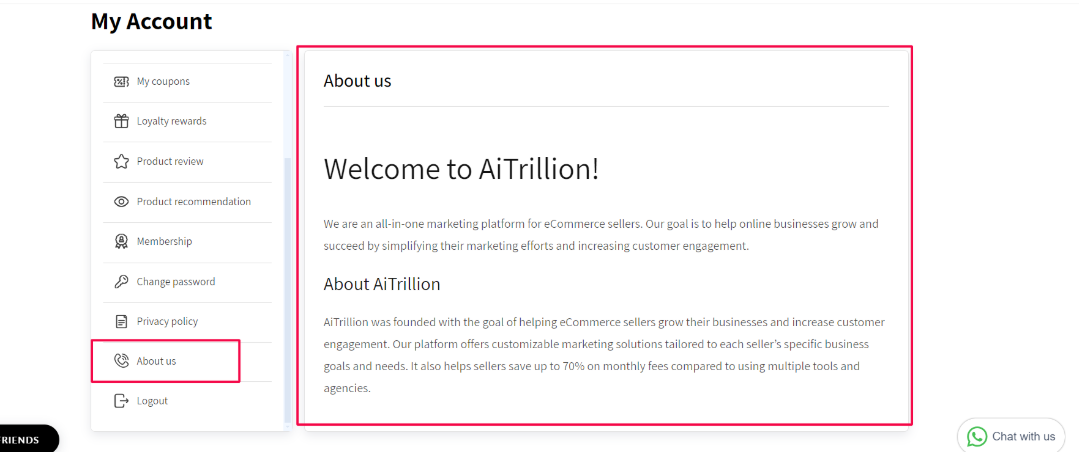
Refer a friend
Refer a Friend tab displays the refer a friend activity set at the Earn points activity
Note: To display this tab Loyalty module must be enabled and To enable the refer a friend activity - Click here
Affiliate program configuration
Step 1: Go to Affiliate program settings
Step 2: Add the Affiliate page URL and Click on Save and continue
Membership V1
If you are using Membership V1, create a page in your store and add the Membership V1 shortcode there. Then, put the page URL in the AiTrillion customer account settings.
Also, if you are using any template, make sure to include this code in the template.
Create a new page and replace pjknoxxx.myshopify.com with your domain name
<div class="aaa-success-msg-account"></div><div class="aaa-error-msg-account"></div><div class="aaa_customer_all_plan_listing" data-customer-email="{{ customer.email }}" data-customer-id="{{ customer.id }}"> </div> <script> function isMyMembershipScriptLoaded() { var url = 'https://shopifycdn.aaawebstore.com/membership/appfiles/aaa_membership_script_min_v3.js?shop=pjknoxxx.myshopify.com'; var jsFound = 0; var scripts = document.getElementsByTagName('script'); for (var i = scripts.length; i--;) { if (scripts[i].src == url) { jsFound = 1; } } if(!jsFound) { var headTag = document.getElementsByTagName('head')[0]; var jqTag = document.createElement('script'); jqTag.type = 'text/javascript'; jqTag.src = url; jqTag.onload = ''; headTag.appendChild(jqTag); } } isMyMembershipScriptLoaded(); </script>
Refer a friend
Related Articles
Get Your WhatsApp Display Name Approved
Why WhatsApp Display Name Approval Is Important for Businesses? Your WhatsApp display name is visible in: Customer chats WhatsApp notifications Automated messages Payment and verification flows ❌ Without approval: Messages may fail to deliver ...Display the AI Agent on your storefront
Introduction After creating and publishing your AI Agent, you can display it on your storefront to provide customers with instant, AI-powered assistance. This article explains how to enable the AI Agent widget on your Shopify store and verify that it ...Manage the Loyalty Button Visibility on the Website
Introduction The Loyalty Button is the primary entry point for customers to access your Loyalty Rewards Program on the storefront. Managing its visibility allows you to control when and where customers see the button, ensuring it fits seamlessly with ...Unpublish Reviews from Your Store
Introduction Unpublishing reviews allows you to control which customer feedback is visible on your storefront. By removing specific reviews from public display, you can manage content quality, address concerns internally, and ensure that only ...Setup Product And Store Reviews
Introduction Customer reviews play a key role in influencing purchase decisions and building trust with your audience. Setting up Product and Store Reviews allows you to collect valuable feedback, showcase customer experiences, and strengthen your ...