Display the AI Agent on your storefront
Introduction
After creating and publishing your AI Agent, you can display it on your storefront to provide customers with instant, AI-powered assistance. This article explains how to enable the AI Agent widget on your Shopify store and verify that it is visible and ready to assist your customers.
Here are the steps to display the AI Agent in the front store:
Step 2: Copy the Integration script.
Step 3: Go to Online store >> click on Edit theme
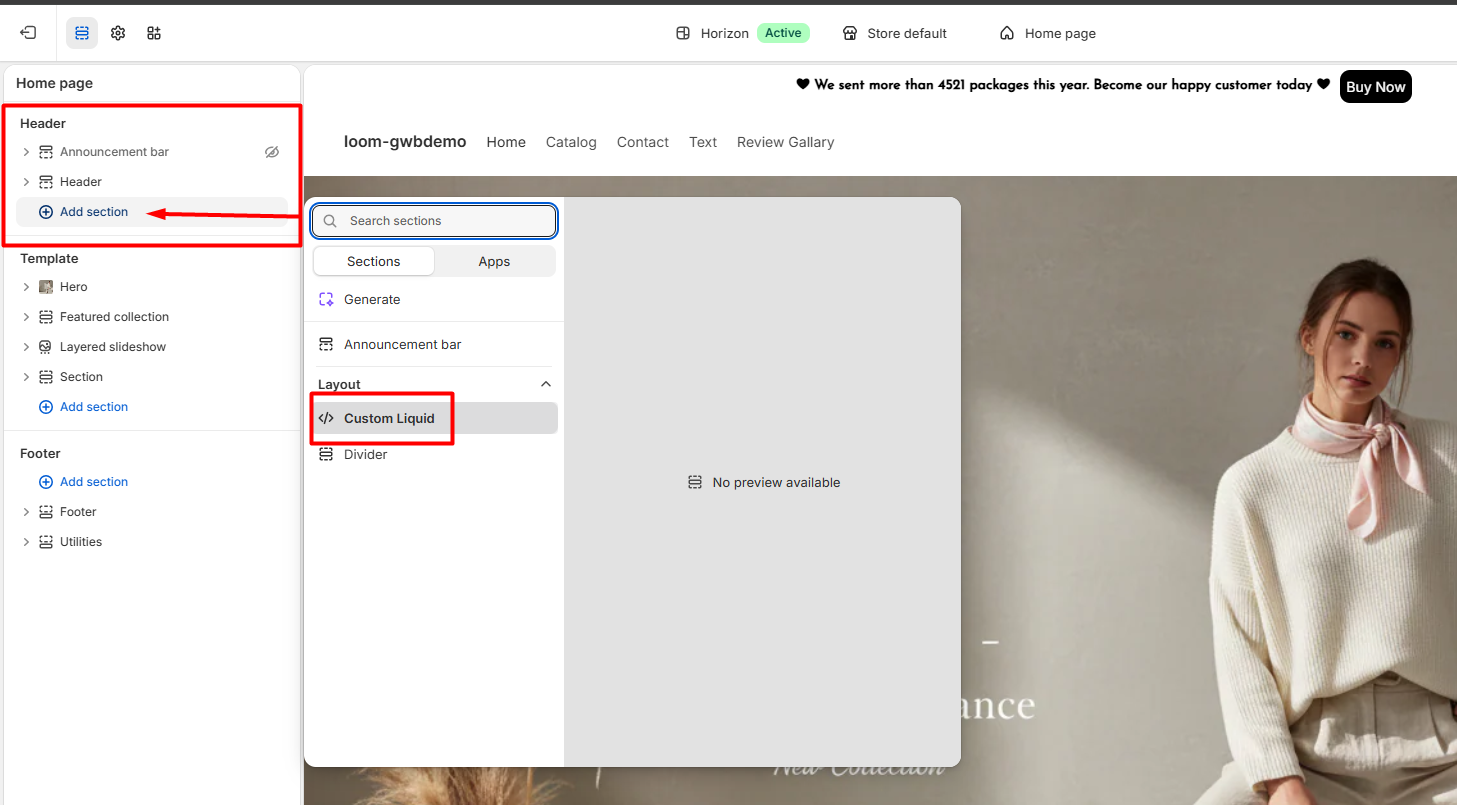
Step 4: In the Header section, click on Add section and click on Custom liquid.
Step 5: Paste the copied code and click on the Save button.
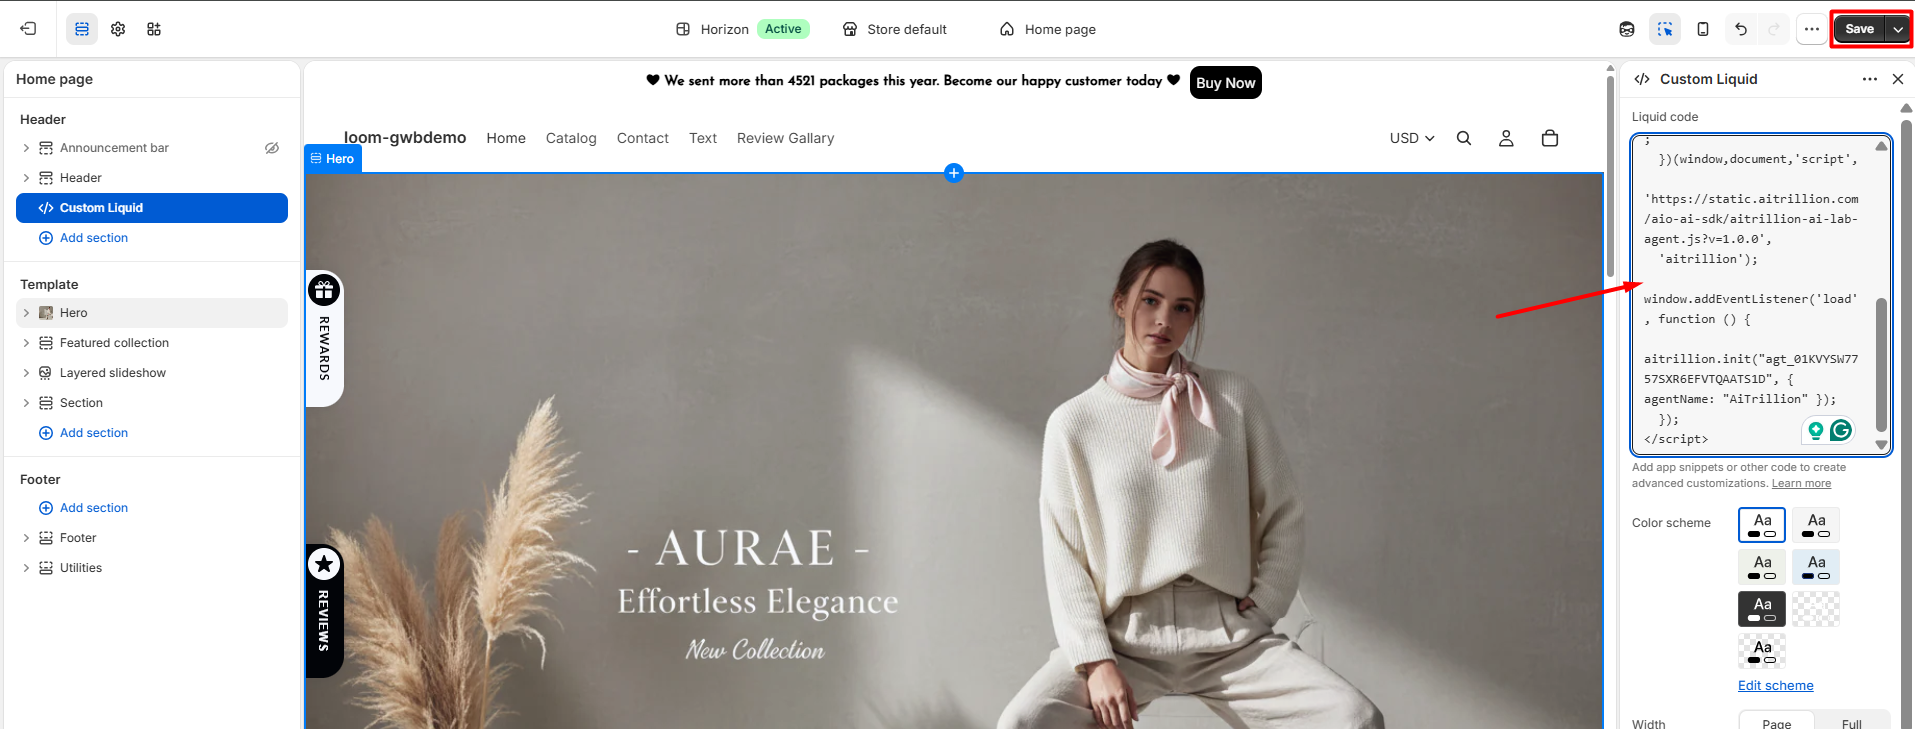
Note: Similarly you can add multiple agent's code
Now, the AI Agent will appear in the front store
Important Notes:
- Ensure your AI Agent is published and in Active status before integrating it into your storefront.
- Copy the complete integration script without making any modifications. Editing the script may prevent the AI Agent from loading correctly.
- Add the integration script to a Custom Liquid section in your Shopify theme header as described in this article.
- Click Save after adding the script to apply the changes to your storefront.
- If the AI Agent does not appear immediately, clear your browser cache or refresh the storefront after a few minutes.
- If you update your AI Agent's settings or knowledge sources, there is no need to reinstall the integration script. Simply republish the AI Agent to apply the latest changes.
- Ensure your theme does not block custom JavaScript or third-party scripts, as this may prevent the AI Agent widget from loading properly.
- If your store uses multiple themes, make sure you add the integration script to the published (live) theme or the theme where you want the AI Agent to appear.